Tuesday, 16 January 2018

The Rectus Femoris Muscle in Yoga.

Here’s the anatomy…

The rectus femoris is one of the four heads of the quadriceps muscle. It runs from the anterior inferior iliac spine to the quadriceps tendon, which attaches to the patella or kneecap. The patella then attaches to the tibial tubercle via the patellar tendon. The rectus femoris thus crosses both the hip and the knee, making it a bi-articular muscle. Note that the other three heads of the quadriceps muscle only cross the knee joint and are mono-articular (figure 1).
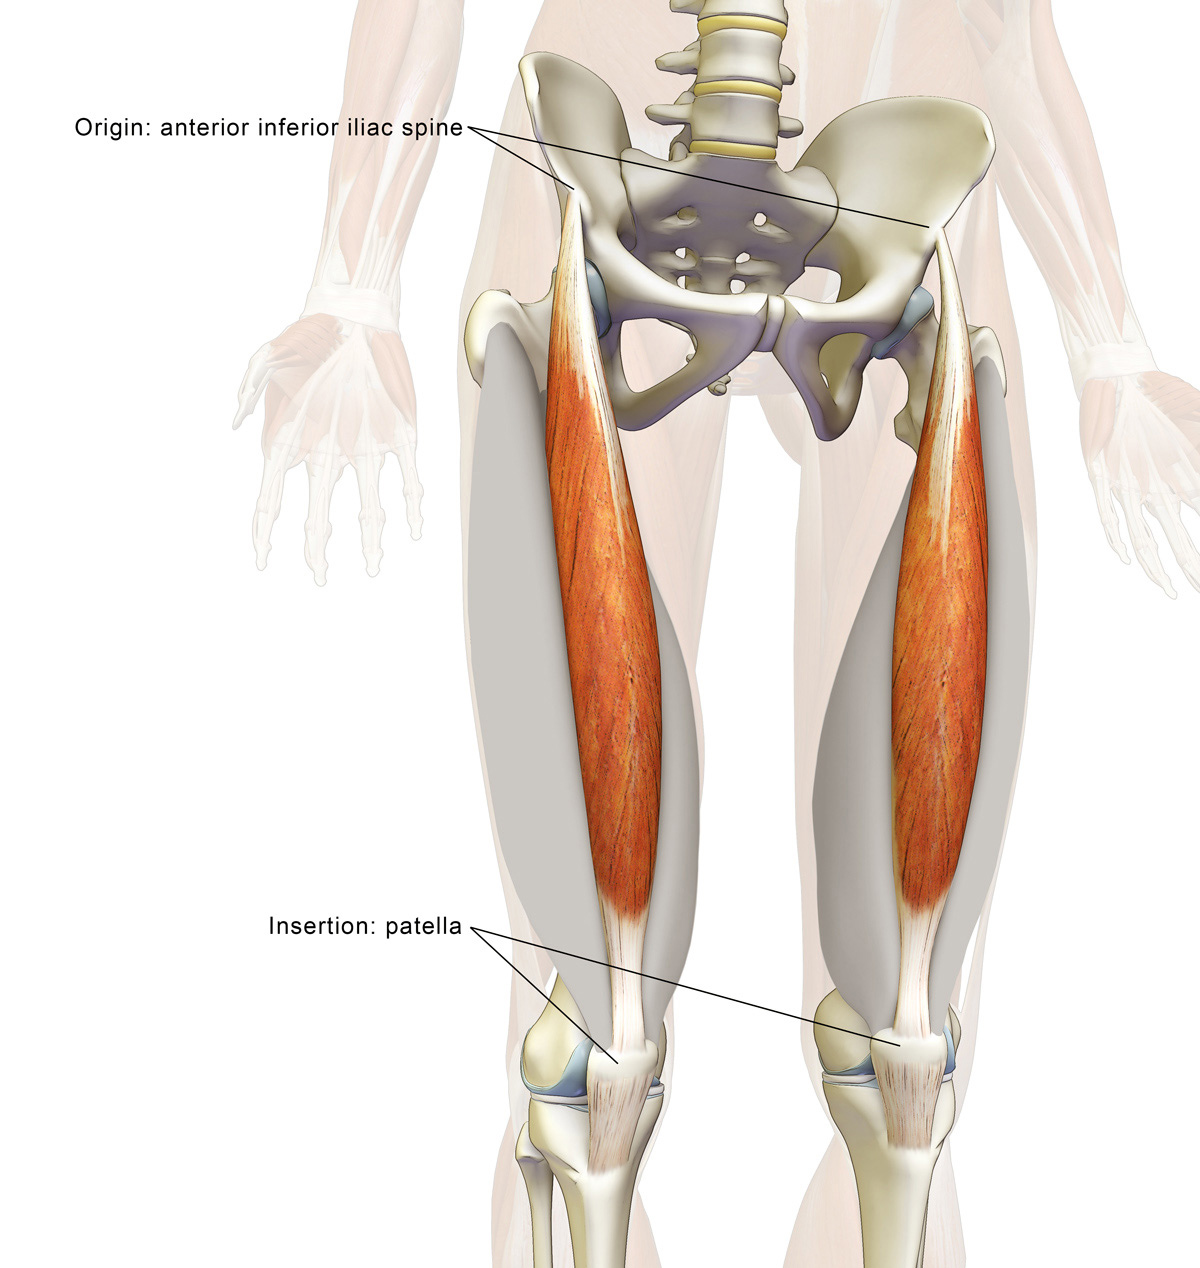
Figure 1: The rectus femoris muscle with its origin and insertion.

The rectus femoris combines with the rest of the quadriceps to extend the knee joint. It also acts as a synergist of hip flexion and has increased activity with abduction and external rotation of the hip joint. Figure 2 illustrates this in Supta padangustasana (performed with the leg abducted). Click here to learn more about the relationship between the quadriceps and the pelvis in our blog post, “Preventative Strategies for Lower Back Strains in Yoga.”
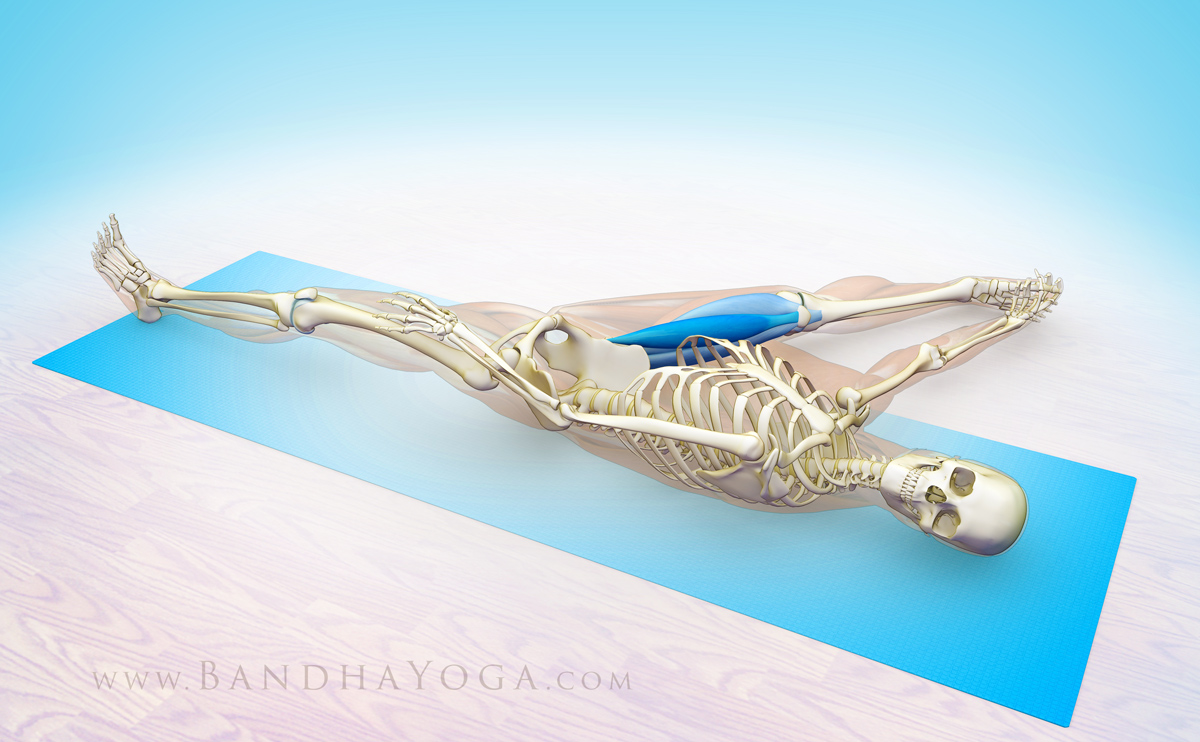
Figure 2: The rectus femoris contracting to flex the hip and extend the knee in Supta padangustasana.

Stretching the rectus femoris is best accomplished in poses that combine hip extension and knee flexion. Poses like Virasana (with the hips flexing) are good for stretching the other heads of the quadriceps, however, a reclining variation is necessary to lengthen the rectus femoris. Figure 3 illustrates two poses that stretch this muscle.
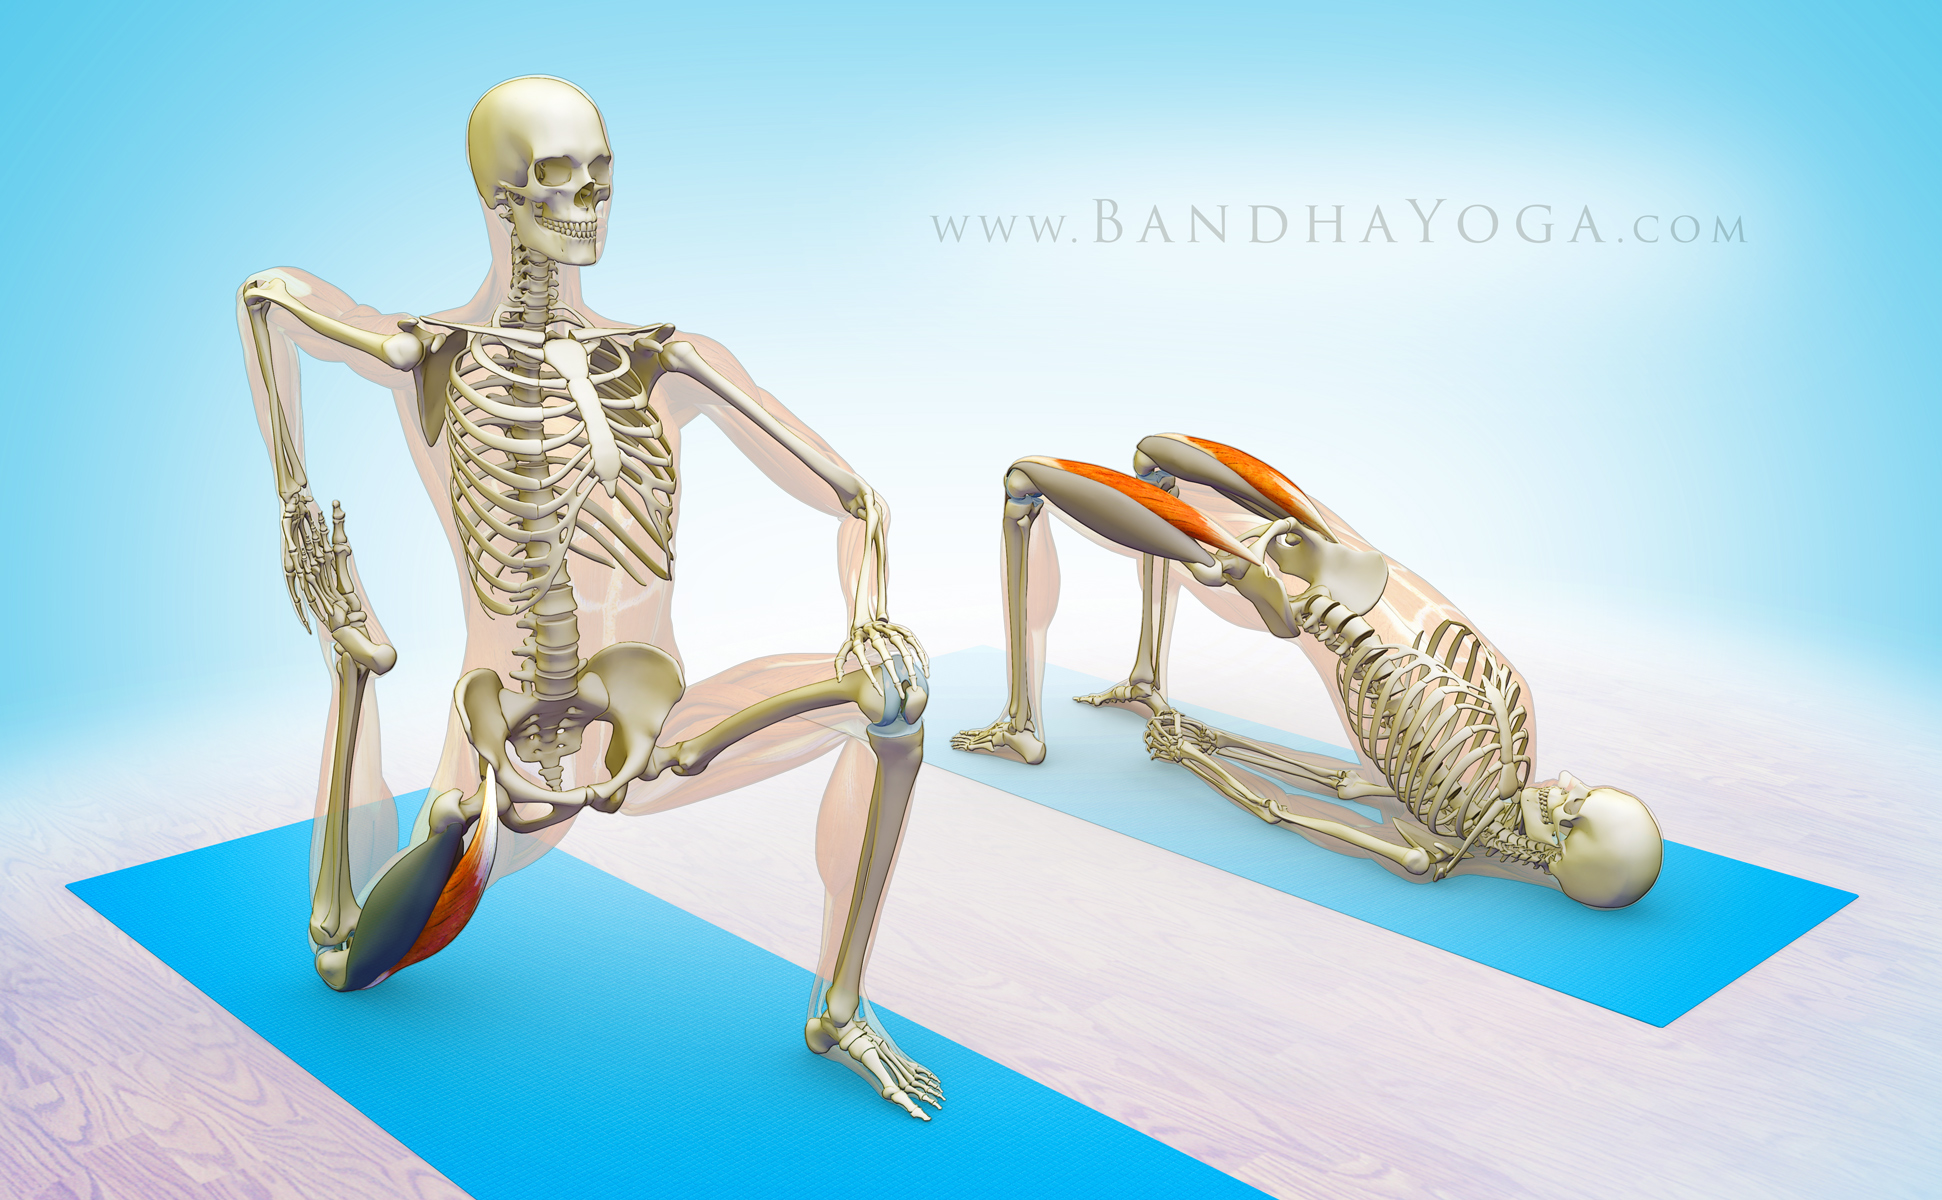
Figure 3: Stretching the rectus femoris by extending the hip and flexing the knee.

Finally, figure 4 illustrates the “antagonist/synergist” relationship between the rectus femoris and the gluteus maximus in poses like Warrior I. The gluteus maximus is a hip extensor and, thus, an antagonist of the rectus femoris for this action. If the foot is fixed on the mat, contracting the gluteus maximus tilts the pelvis as shown (closed chain action). Tilting the pelvis back and down creates a pull on the rectus femoris, which is transmitted to the knee joint, leading to more efficient knee extension. In this manner, the gluteus maximus is an indirect synergist of knee extension.
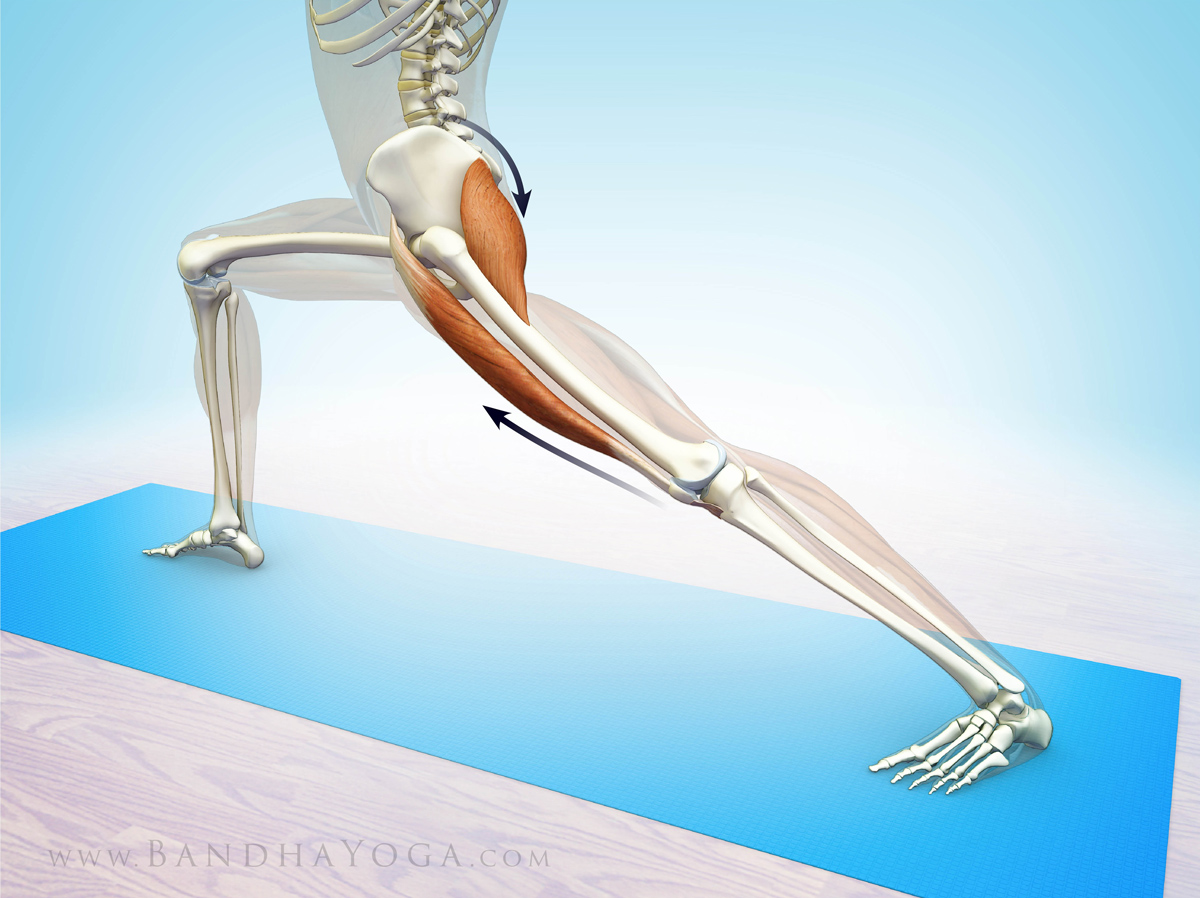
Figure 4: The antagonist/synergist relationship of the gluteus maximus to the rectus femoris. 


via: the daily bandha yoga.

Monday, 15 January 2018

The Gluteus Medius Muscle in Yoga.

Here’s the anatomy…

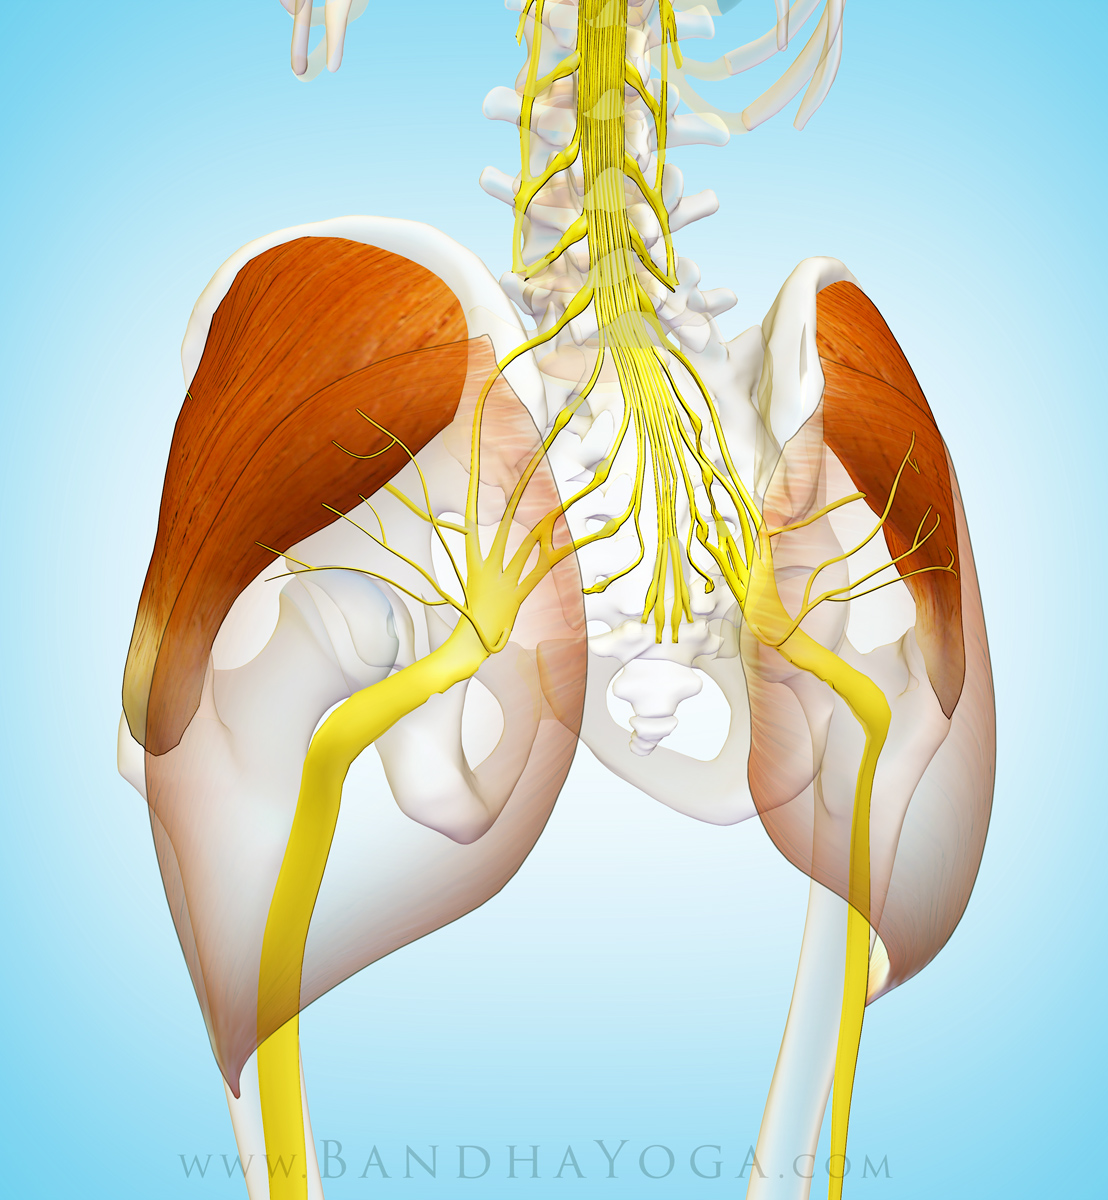
The gluteus medius originates on the outer surface of the ilium bone and runs to the greater trochanter of the femur. This muscle acts to stabilize the pelvis when standing on one leg and during walking. The gluteus medius is also a primary abductor of the hip. Its anterior fibers act to synergize flexing and internally rotating the flexed hip; its more posterior fibers synergize extending and externally rotating the extended hip. The gluteus medius is innervated by the superior gluteal nerve, which is formed from nerve roots L4, L5, and S1. Figure 1 illustrates this muscle. 

Figure 1: The gluteus medius muscle with its innervation from the superior gluteal nerve. The gluteus maximus, with the inferior gluteal nerve is shown as a see-through.

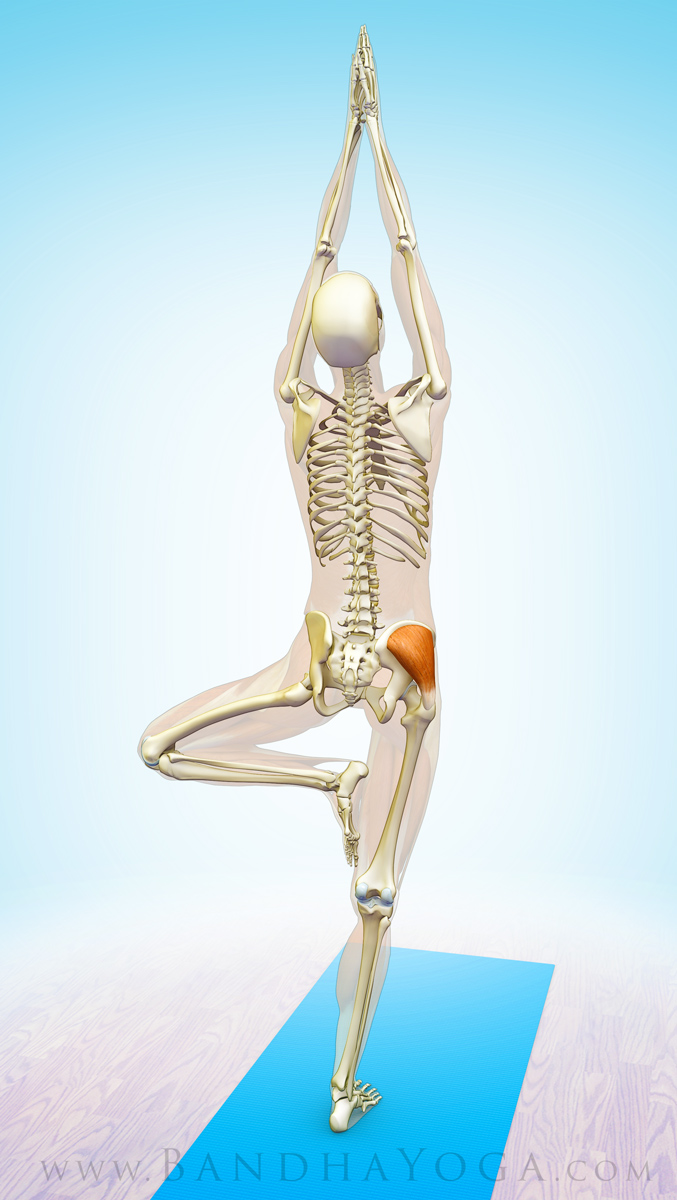
Tree pose and other one-legged standing pose help to strengthen the gluteus medius, which is essential for stabilizing the pelvis of the standing leg (figure 2). Click here to read more about the function of the gluteus medius in one-legged asanas in our blog post, “Anatomic Sequencing in Yoga”. Click here to read about the connections of the gluteus medius during gait.

Figure 2: The gluteus medius stabilizing the pelvis in Tree Pose.

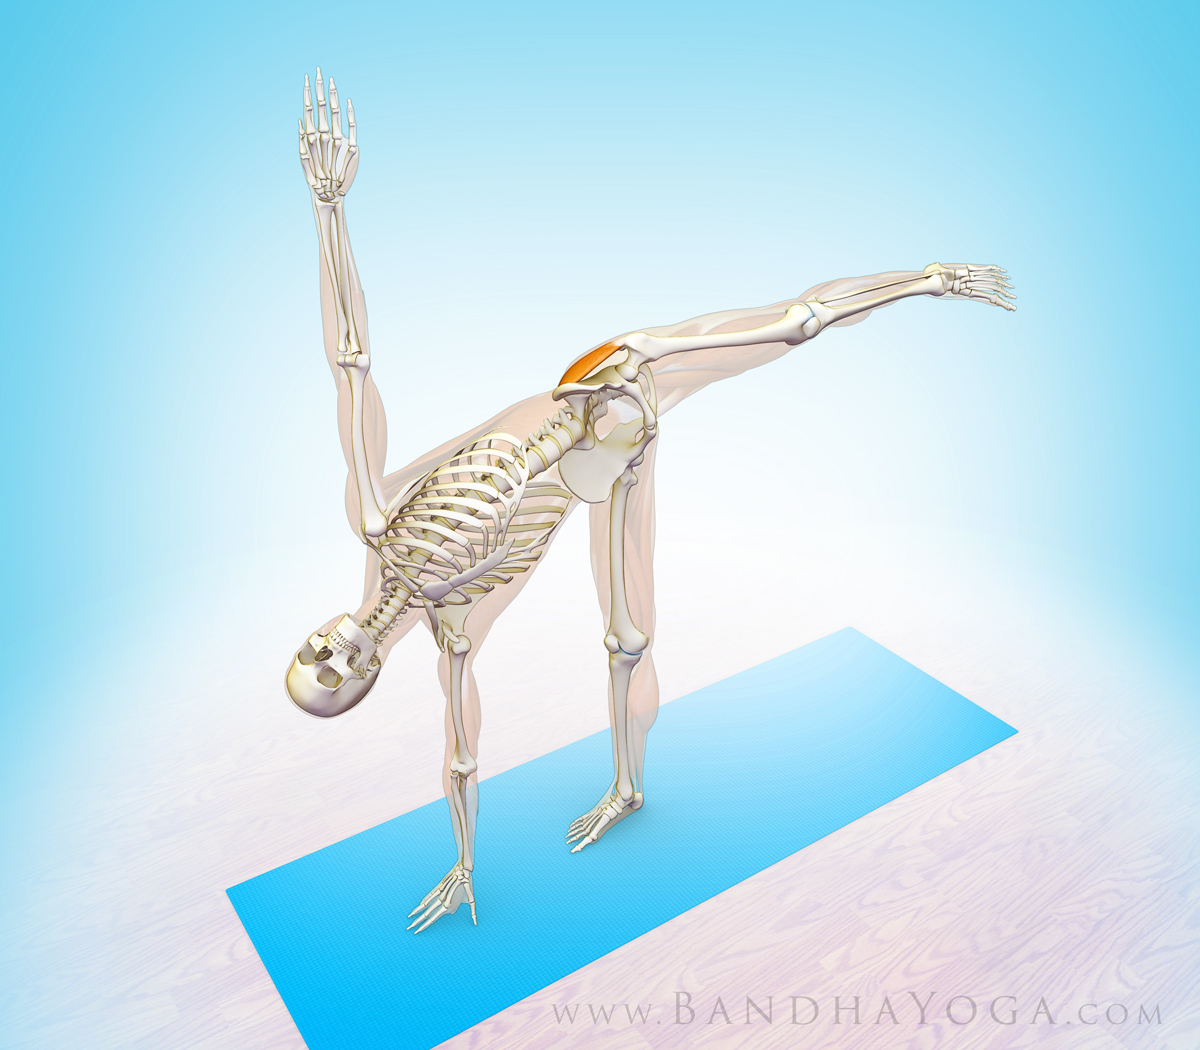
Figure 3 illustrates the gluteus medius contracting to help lift the leg in Ardha chandrasana (Half Moon Pose).

Figure 3: The gluteus medius stabilizing the lifted leg in Half Moon Pose.

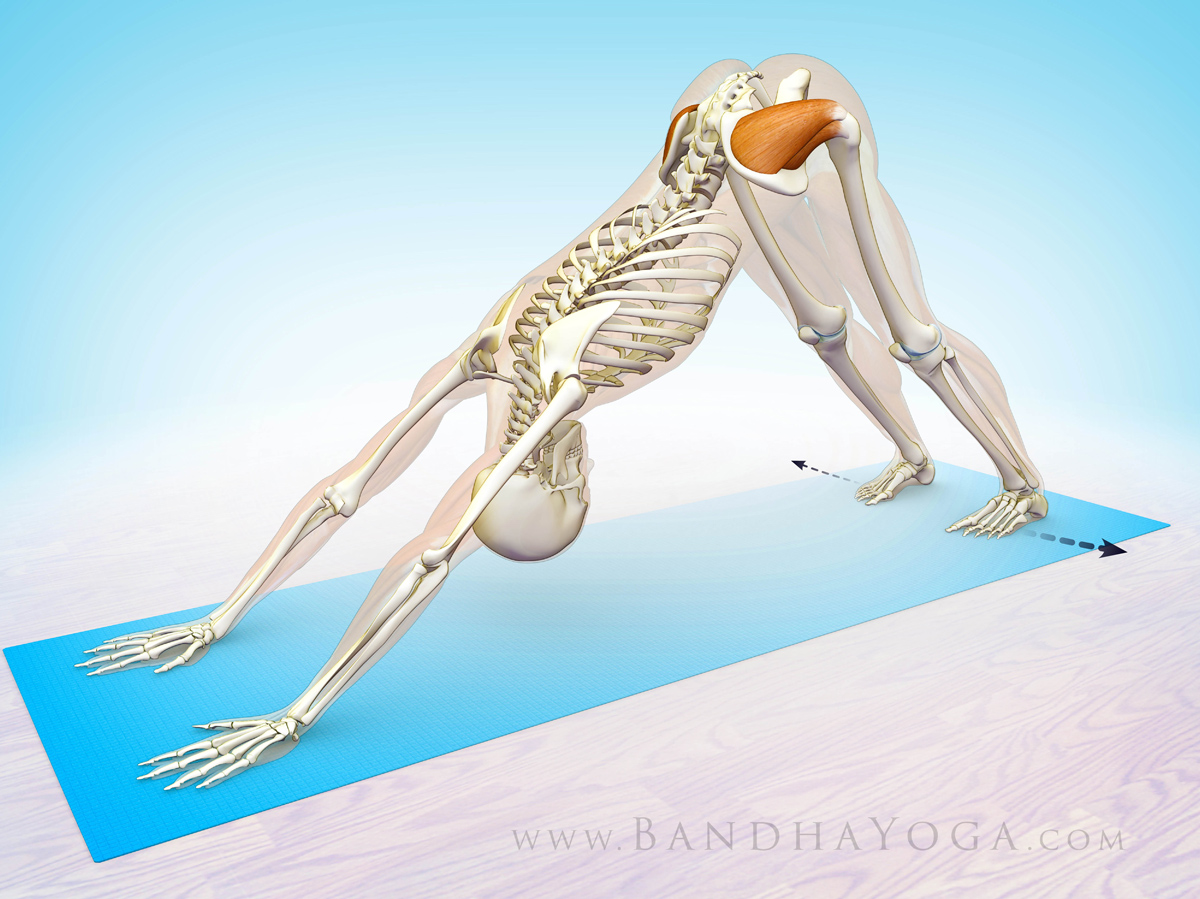
Engaging the gluteus medius in Downward Dog pose can be used to synergize hip flexion. This muscle also helps to internally rotate the hips, thereby bringing the kneecaps to face forward. The cue for engaging the gluteus medius in Downward Dog Pose is to press the feet into the mat and then attempt to drag them apart. The feet remain constrained on the mat and do not move. However, the abductor muscles, including the gluteus medius, minimus, and TFL, engage to refine flexion and rotation of the hips. 

Figure 4 illustrates how to work with the gluteus medius and minimus to refine Downward Dog Pose.

Figure 4: Engaging the gluteus medius and minims in Downward Dog Pose.

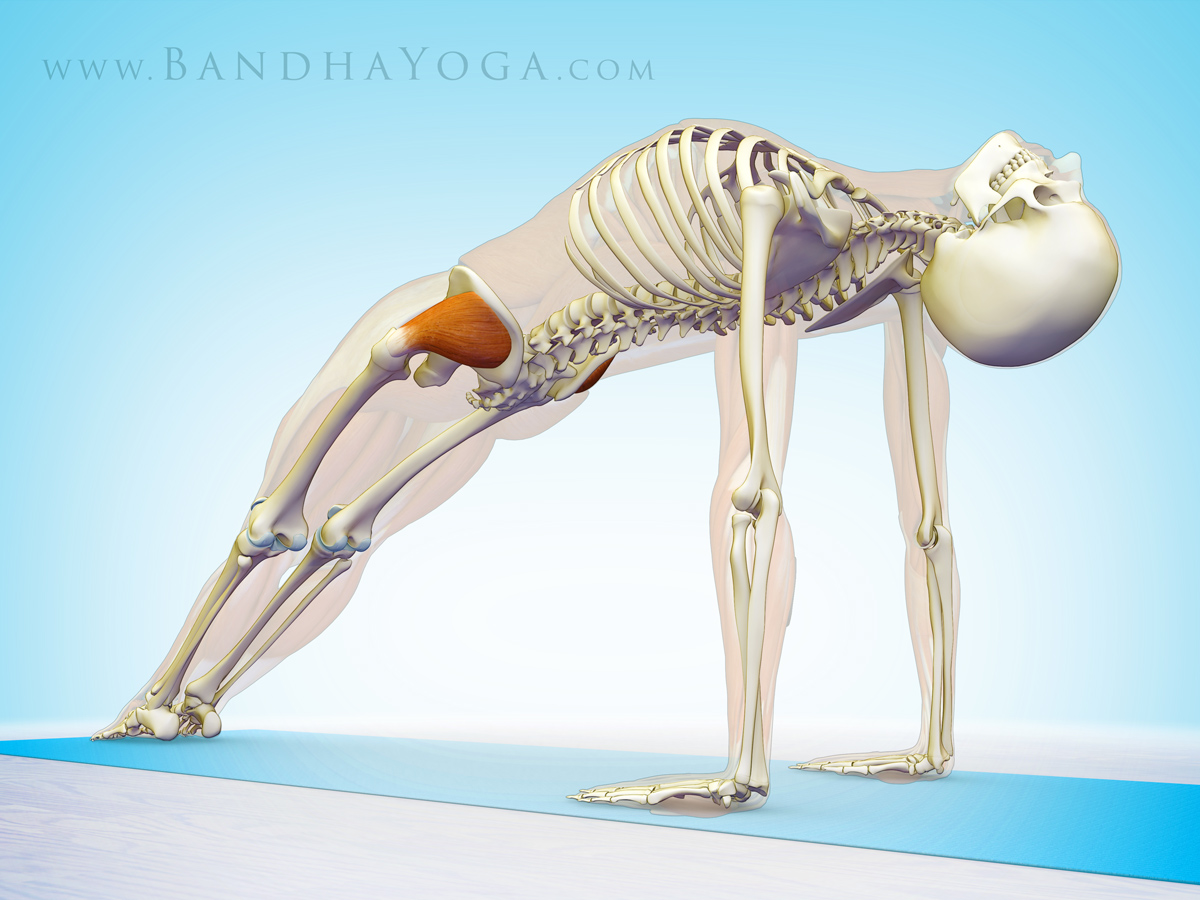
Figure 5 illustrates the gluteus medius synergizing hip extension in Purvottanasana.

Figure 5: Engaging the gluteus medius to synergize hip extension in Purvottanasana.

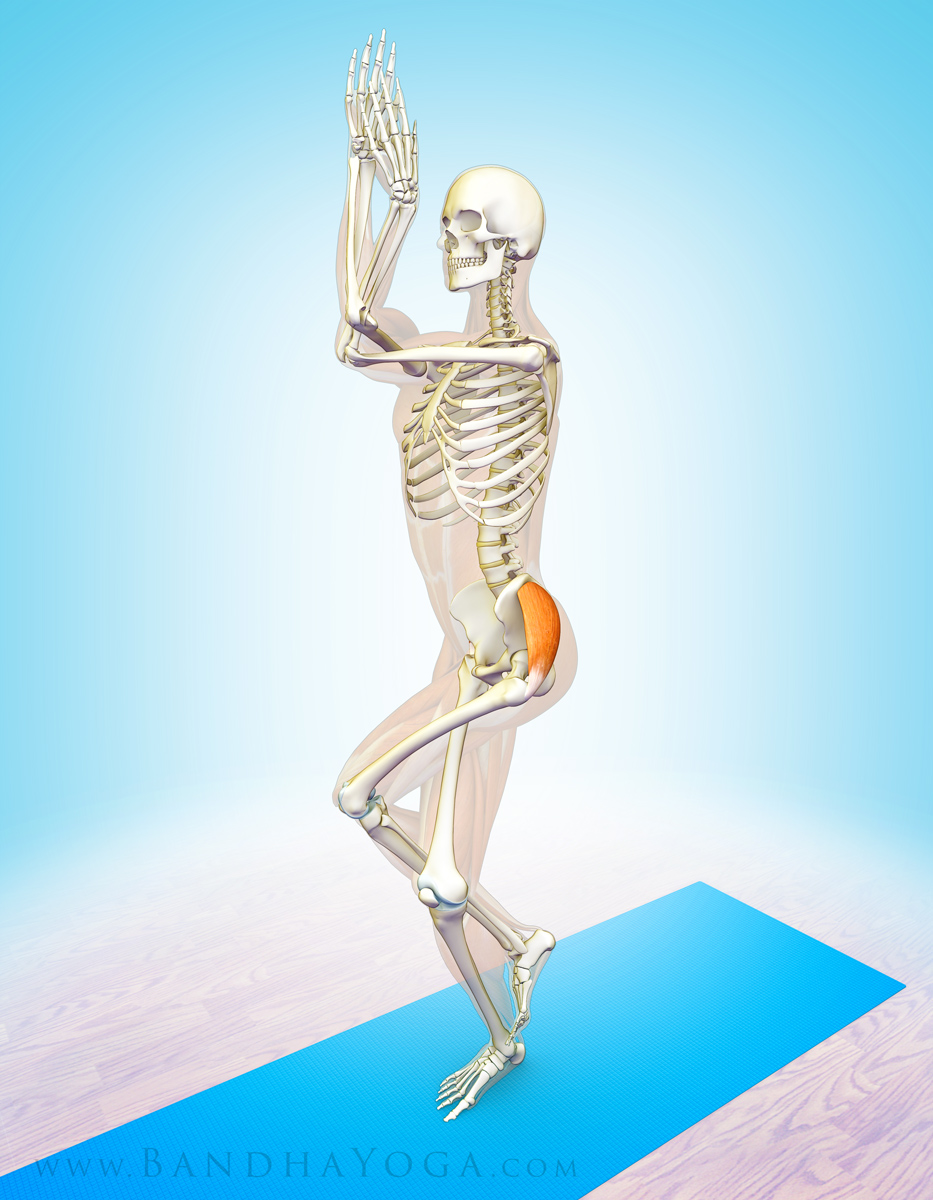
Finally, figure 6 illustrates stretching the gluteus medius in Garudasana.

Figure 6: Stretching the gluteus medius in Garudasana.

via: the daily bandha yoga.

Tuesday, 9 January 2018

Posture Guide...

Good Posture Infographic

Stomach Vacuum...

#healthy #pregnant

Stomach crunches used to be the biggest trend for those who wanted to have a flat tummy. Now, there’s something new that revolutionary changed the fitness world in getting the effects in this issue: stomach vacuuming.Stomach crunches used to be the biggest trend for those who wanted to have a flat tummy. Now, there’s something new that revolutionary changed the fitness world in getting the effects in this issue: stomach vacuuming.
This exercise not only strengthens the deepest muscle in your abdomen (the transverse abdominal) but also activates it.
The performing of this exercise is very simple, by only contracting the muscles. With the proper performance, you’ll get a slimmer waistline and some other benefits, such reduced lower back pain, and improved posture.
In the clinical context, the stomach vacuum exercise is known the abdominal drawing in the maneuver. Stomach vacuum is actually a pillar of both Pilates and yoga and it is focused on breathing.
How to Do the Stomach Vacuum
For the beginners is recommended to start with the most basic move known as the supine stomach vacuum. Here are the steps how to do the stomach vacuum exercise:
1) Start on lying, sitting or standing position or on your fours.
2) Your knees should be bent with your feet flat on the ground.
3) Intensely exhale as much as you can.
4) Pulling your belly button in, like you’re trying to reach your spine with it.
5) Stay in this position for at least 15 seconds.
6) Take small breaths if you need to.
7) Repeat the same for three to five times.